Imagine capturing stunning, artistic photographs that seamlessly blend multiple exposures together, resulting in breathtaking masterpieces. With the right techniques and a little bit of practice, you can unlock the full potential of your camera’s multiple exposure blending feature. In this article, we will guide you on how to use this fascinating tool to achieve truly creative results. Get ready to embark on an exciting journey where you will learn to harness the power of light and shadows to create visually stunning images.
Understanding Multiple Exposure Blending
Multiple exposure blending is a technique used in photography to combine multiple exposures of a scene into a single image. By blending the exposures, you can achieve a wider dynamic range, capture more details in both highlights and shadows, and create unique and artistic effects in your photos. This technique allows you to bring out the best elements from each exposure and create a final image that showcases the true beauty of the scene.
Benefits of Using Multiple Exposure Blending
There are several benefits to using multiple exposure blending in your photography. Firstly, it allows you to capture a wider tonal range, meaning you can retain details in both bright highlights and dark shadows. This is especially useful in high-contrast scenes where a single exposure may not be able to capture all the tonal information accurately.
Another benefit of multiple exposure blending is the ability to create images with increased depth and dimension. By combining multiple exposures, you can bring out intricate details that may not be visible in a single exposure, resulting in a more visually appealing and dynamic final image.
Furthermore, multiple exposure blending enables you to unleash your creativity and experiment with different artistic effects. Whether it’s creating a dreamy double exposure image or blending different elements of a scene to create a unique composition, this technique offers endless possibilities for expressing your artistic vision.

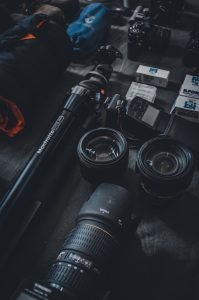
This image is property of images.pexels.com.
Choosing the Right Camera
When it comes to multiple exposure blending, choosing the right camera can make a significant difference in your results. Here are some considerations to keep in mind when selecting a camera for this technique:
Considerations when selecting a camera for multiple exposure blending
-
Dynamic Range: Look for a camera with a wide dynamic range, as this will allow you to capture a broader range of tones in each exposure, resulting in more detailed final images.
-
Multiple Exposure Mode: Some cameras have a dedicated multiple exposure mode that simplifies the blending process. Consider a camera that offers this feature to make capturing and blending multiple exposures more convenient.
-
Manual Control: Having manual control over your camera’s settings is crucial for multiple exposure blending. Look for a camera that allows you to adjust settings such as aperture, shutter speed, and ISO independently to achieve the desired effect.
Features to look for in a camera for multiple exposure blending
-
Auto-Align: Cameras with built-in auto-align feature make it easier to combine multiple exposures accurately without the need for additional post-processing.
-
Large Buffer Capacity: If you plan on capturing a series of multiple exposures in quick succession, a camera with a large buffer capacity will ensure that you can shoot continuously without any interruption or delay.
-
High ISO Performance: In low-light situations, being able to push the ISO without significant noise can be crucial. Look for a camera with excellent high ISO performance to maintain image quality in challenging lighting conditions.
Setting Up Multiple Exposure Blending
Before you start capturing multiple exposures, it’s essential to understand the necessary camera settings and enable the multiple exposure blending feature. Let’s explore these aspects:
Understanding the Camera Settings for Multiple Exposure Blending
To achieve successful multiple exposure blending, you’ll need to familiarize yourself with a few key camera settings:
-
Exposure Compensation: Dialing in the appropriate exposure compensation will help ensure that each exposure is correctly exposed. Experiment with different settings to achieve the desired tonal range.
-
Metering Mode: Choose an appropriate metering mode based on the scene’s lighting conditions. Evaluative or matrix metering is often a good starting point.
-
Auto ISO: Enabling auto ISO can be helpful in situations with changing lighting conditions. This allows the camera to adjust ISO automatically to maintain proper exposure.
Enabling Multiple Exposure Blending on Your Camera
The process of enabling multiple exposure blending may vary depending on your camera model. However, most cameras offer this feature in their menu settings. Refer to your camera’s user manual to locate and activate the multiple exposure blending option. Once enabled, you can usually specify the number of exposures to be captured and the blending method to be used.

This image is property of images.pexels.com.
Planning Your Shots
Planning your shots is essential to achieve the desired results with multiple exposure blending. Consider the following aspects when deciding on the subject or scene:
Deciding on the Subject or Scene
Choose subjects or scenes that lend themselves well to multiple exposure blending. Scenes with a wide tonal range, interesting textures, and contrasting elements can produce stunning results. Landscapes, cityscapes, and portraits with unique lighting conditions or creative compositions are often great choices.
Composition Techniques for Multiple Exposure Blending
When composing your shots, experiment with different techniques to enhance the final blended image:
-
Overlapping Elements: Include elements in your composition that overlap from one exposure to another. This can create a sense of continuity and give your images a more cohesive feel.
-
Symmetry and Reflections: Look for symmetrical compositions or scenes with reflections to take full advantage of the multiple exposure blending technique. This can result in visually striking and harmonious images.
-
Leading Lines: Utilize leading lines that guide the viewer’s eye through the frame. By incorporating leading lines in different exposures, you can create a more dynamic and engaging final image.
Capturing Multiple Exposures
Once you have planned your shots and composed your frame, it’s time to capture the multiple exposures. Consider the following factors:
Determining the Number of Exposures to Blend
The number of exposures to blend depends on the effect you want to achieve and the tonal range of the scene. In general, blending 2-5 exposures is common, but you can experiment with more or fewer exposures to meet your artistic vision.
The Importance of Stability and a Tripod
To ensure precise alignment between each exposure, it’s crucial to keep your camera stable. Use a sturdy tripod to eliminate camera shake and maintain consistent framing throughout the multiple exposure sequence. Additionally, consider using a remote shutter release or the camera’s built-in self-timer to further minimize any potential movement.

This image is property of images.pexels.com.
Blending Methods
There are different blending methods available for merging multiple exposures. Each method produces unique results, so it’s important to choose the most appropriate one for your desired effect:
Different Blending Methods Available
-
Average Blending: This method calculates the average value of each pixel from the multiple exposures. It is useful for reducing noise and maintaining a natural and balanced overall tonality.
-
Additive Blending: Additive blending selectively adds the brightest parts of each exposure onto a base exposure. It can be used to create striking high-key images or emphasize bright highlights.
-
Screen Blending: Screen blending blends the pixels of each exposure as if they were projected onto a screen. It is effective in retaining the highlight details and can create a lighter and more ethereal look.
Choosing the Most Appropriate Blending Method for Your Desired Effect
Experiment with different blending methods to see how they impact the final image. Consider the tonal range, contrast, and mood you want to convey and choose the blending method that best achieves your desired effect.
Post-Processing Techniques
Post-processing plays a crucial role in refining and enhancing your multiple exposure blends. Here are some important considerations and tools to aid you in this stage:
Importance of Post-Processing
Even though merging multiple exposures in-camera can create impressive results, some adjustments and fine-tuning are typically required in post-processing. Post-processing allows you to refine the tonal range, adjust color balance, and apply creative effects for a polished final image.
Software and Tools for Post-Processing Multiple Exposure Blends
There are various software and tools available for post-processing multiple exposure blends. Adobe Photoshop is a popular choice due to its advanced layering and blending capabilities. Other editing software, such as Lightroom, also offers basic blending options. Additionally, specialized blending plugins and apps can further streamline and enhance your post-processing workflow.
Step-by-Step Guide on Post-Processing a Multiple Exposure Blend
-
Import and Organize: Transfer your multiple exposure blend images to your computer and organize them in a dedicated folder.
-
Alignment and Layering: Open the images in your chosen editing software, align them if necessary, and stack them as separate layers.
-
Blending Method: Apply the desired blending method to the layers. Experiment with different modes and opacity levels to achieve the desired look.
-
Adjustment and Fine-Tuning: Adjust the exposure, contrast, color balance, and other settings to enhance the overall tonality and mood of the image. Experiment with creative effects and filters to further personalize your blend.
-
Save and Export: Once you are satisfied with the final result, save your image in the desired file format and resolution for web or print use.
Creative Ideas and Inspiration
Multiple exposure blending provides endless creative possibilities. Here are some ideas to explore and find inspiration from:
Exploring Different Creative Possibilities with Multiple Exposure Blending
-
Double Exposure Portraits: Overlaying a portrait with a textured background or another image can produce visually captivating results.
-
Nature and Cityscape Blends: Blend elements from different exposures to create surreal landscapes or combine urban and natural elements for a unique composition.
-
Abstract and Fine Art Blending: Experiment with merging various textures, patterns, and shapes to create abstract or fine art pieces.
Finding Inspiration from Other Photographers
Look for inspiration from other photographers who specialize in multiple exposure blending. Study their techniques, compositions, and use of different blending methods to spark your creativity. Joining online communities or photography forums dedicated to this technique can also provide valuable insights and feedback from fellow enthusiasts.
Common Challenges and How to Overcome Them
While multiple exposure blending can yield stunning results, there are some common challenges that photographers may encounter. Here are a couple of challenges and tips for overcoming them:
Dealing with Exposure and Tonal Range Issues
In scenes with extreme contrast, it can be challenging to balance the exposures and retain details in both highlights and shadows. One way to overcome this is by using exposure bracketing and capturing a wider range of exposures. This will give you more options to work with during blending and post-processing.
Furthermore, experimenting with different blending methods can help mitigate exposure and tonal range issues. Each blending method handles highlights and shadows differently, so trying different approaches may produce better results.
Avoiding Ghosting and Motion Blur
Ghosting can occur when there is movement between exposures, resulting in transparent or overlapping elements. To minimize ghosting, ensure that your camera is stable on a tripod and avoid any movement in the scene.
When photographing moving subjects, such as flowing water or people, using a faster shutter speed or incorporating intentional motion blur can create more intentional and artistic effects. Experiment with different techniques to capture the desired level of motion and minimize unintended ghosting.
Conclusion and Final Thoughts
Understanding and utilizing multiple exposure blending can elevate your photography to new creative heights. By blending multiple exposures, you have the opportunity to capture a wider tonal range, create unique compositions, and bring out the best elements in your scenes. Remember, choosing the right camera, planning your shots thoughtfully, and experimenting with blending methods and post-processing techniques are key to achieving the desired results.
So, embrace the creative potential of multiple exposure blending, practice, and have fun exploring this artistic technique. Let your imagination run wild and capture stunning images that showcase your unique vision and creativity.